Table of Content
- Define the Scope of the Soil Testing Laboratory
- Plan the Soil Testing Laboratory Layout
- Select Essential Equipment for Soil Testing Laboratory
- Establish Soil Testing Lab Workstations
- Implement Quality Control Measures in Soil Testing Laboratory
- Ensure Safety and Waste Management
- Conclusion
A well-equipped soil testing laboratory plays an important role in evaluating soil quality, nutrient availability, and other properties that influence agricultural productivity. Accurate soil analysis helps farmers, researchers, agricultural institutions, and environmental professionals make informed decisions about soil management and crop requirements.
Setting up a Soil Testing Lab requires more than purchasing laboratory instruments. The laboratory needs an appropriate workspace, suitable testing equipment, trained personnel, proper sample-handling procedures, and a systematic approach to quality control.
Define the Scope of the Soil Testing Laboratory
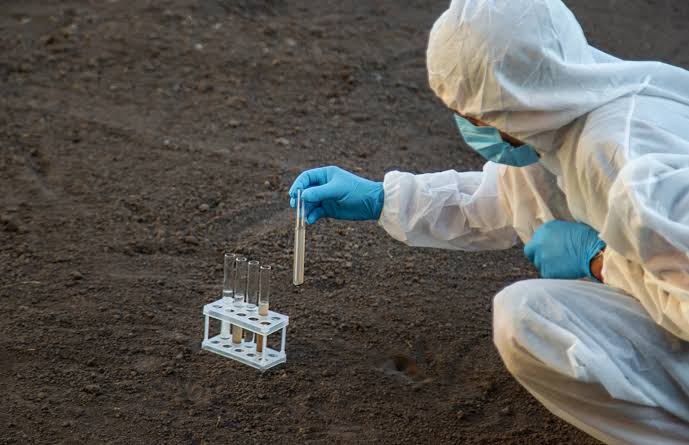
The first step is to determine the type and volume of testing the laboratory will perform. The scope may vary depending on whether the laboratory is intended for agricultural testing, research, environmental analysis, or educational purposes.
Common soil testing parameters include:
- Soil pH
- Electrical conductivity (EC)
- Soil moisture
- Organic carbon
- Available nitrogen
- Available phosphorus
- Available potassium
- Micronutrients such as iron, zinc, copper, and manganese
- Soil texture and physical properties
Defining the scope helps determine the required instruments, laboratory space, consumables, and testing procedures.
Plan the Soil Testing Laboratory Layout
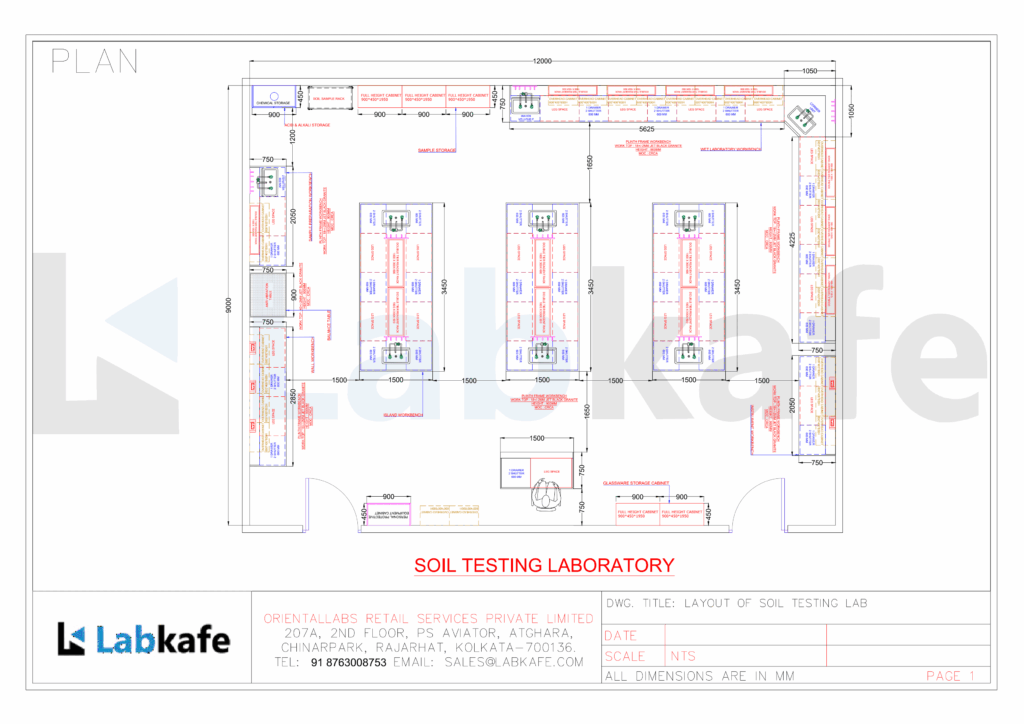
A functional laboratory layout is important for efficient sample movement and safe working conditions. The workspace should provide adequate room for sample reception, preparation, testing, storage, and cleaning. The layout should be designed around the actual workflow rather than simply placing equipment in the remaining space available.
A typical Soil Testing Lab may include separate or designated areas for:
- Sample receiving and labelling
- Soil sample preparation
- Weighing and measurement
- Chemical analysis
- Instrument-based analysis
- Reagent and chemical storage
- Glassware cleaning
- Waste management
Adequate ventilation, lighting, water supply, electrical connections, and drainage should also be considered during laboratory planning.
Select Essential Equipment for Soil Testing Laboratory
The equipment forms the working core of a Soil Testing Lab. However, setting up a laboratory does not necessarily mean purchasing every instrument available. The right equipment depends on the testing parameters, sample volume, laboratory workflow, and level of accuracy required.
pH Meter
Soil pH is one of the fundamental parameters in soil analysis. A laboratory-grade pH meter helps determine whether a soil sample is acidic, neutral, or alkaline, providing useful information about nutrient availability and overall soil conditions.
Electrical Conductivity Meter
An EC meter measures the electrical conductivity of a soil solution or extract. It is commonly used to assess the concentration of soluble salts in soil and can be particularly relevant when evaluating soil salinity.
Analytical Balance
Accurate measurement is essential when preparing soil samples, solutions, and reagents. An analytical balance provides the precision required for weighing small quantities during laboratory procedures.
Hot Air Oven
A hot air oven is commonly used when controlled drying of soil samples or laboratory materials is required. Maintaining a consistent temperature can help achieve more uniform sample preparation for applicable testing procedures.
Muffle Furnace
For certain analytical procedures involving high-temperature heating, a muffle furnace may be required. It can be used in applications such as determining ash content or loss on ignition, depending on the selected testing method.
Spectrophotometer in Soil Testing Laboratory
A spectrophotometer can support the quantitative analysis of specific nutrients and chemical compounds in soil extracts. The exact requirements will depend on the analytical methods and parameters included within the laboratory’s scope.
Establish Soil Testing Laboratory Workstations
A well-organized Lab needs more than the right instruments. Different stages of soil analysis require different working areas, and arranging them into dedicated workstations can improve workflow, organisation, and safety.
Sample Preparation Workstation in Soil Testing Laboratory
This area is used for preparing soil samples before analysis. It may include space for weighing, drying, grinding, sieving, and homogenising samples. However, essential tools such as sieves, trays, spatulas, sample containers, and other preparation equipment should be readily accessible.
Instrumentation Workstation for Soil Testing Laboratory
The instrumentation area houses analytical equipment such as pH meters, conductivity meters, spectrophotometers, and other testing instruments. However, stable work surfaces, suitable electrical connections, and adequate space around each instrument should be considered during setup.
Precision Weighing Workstation in Soil Testing Laboratory
Accurate weighing is an important part of many soil testing procedures. A dedicated area for an analytical balance can help minimise disturbances caused by vibration, dust, or excessive airflow and provide a more controlled environment for precise measurements.
Sample and Reagent Storage Area
Proper storage helps maintain the condition and traceability of samples, chemicals, reagents, and consumables. Clearly labelled storage spaces can make materials easier to locate while reducing the risk of sample mix-ups.
Documentation and Result Recording Area
A designated space for sample records, test worksheets, instrument logs, and result documentation can help maintain proper laboratory records. Digital systems my also be incorporated depending on the laboratory’s workflow.
Implement Quality Control Measures in Soil Testing Laboratory
Quality control should be considered from the beginning of setting up a Lab, rather than being added after the laboratory becomes operational. A basic quality-control framework helps ensure that equipment, testing methods, samples, and records are managed consistently.
Select Standardized Testing Methods
Start by identifying the recognised analytical methods that will be used for each soil parameter. The selected methods should define the required equipment, reagents, sample preparation procedures, calculations, and quality-control checks.
Plan for Instrument Calibration
While selecting laboratory equipment, consider not only the instrument’s specifications but also its calibration and maintenance requirements. Establish a system for initial and periodic calibration of instruments such as pH meters, analytical balances, conductivity meters, and spectrophotometers.
Set Up Quality-Control Samples
The laboratory should have provisions for appropriate blanks, duplicates, control samples, and reference materials, depending on the testing method. These can be incorporated into routine testing to monitor the consistency and reliability of analytical results.
Standardize Sample Handling
Quality control begins before the actual analysis. Establish clear procedures for sample collection, labelling, transportation, preparation, storage, and disposal. Assigning unique sample identification numbers can help maintain traceability throughout the testing process.
Establish a Review Process
The laboratory should have a process for dealing with unexpected or inconsistent results. This may involve checking sample preparation, reagents, instrument performance, calculations, or testing procedures before the result is reported.
Enure Safety Measures and Waste Management
Safety and waste management should be planned while setting up the Soil Testing Lab, not after operations begin. Consider the following requirements:
- Plan safety infrastructure: Ensure adequate ventilation, lighting, electrical connections, water supply, drainage, and accessible emergency exits.
- Provide personal protective equipment (PPE): Keep laboratory coats, gloves, safety glasses, and other required protective equipment readily available.
- Create designated chemical storage: Store chemicals and reagents in clearly labelled areas according to their specific storage requirements. Incompatible chemicals should be separated where necessary.
- Install appropriate safety equipment: Depending on the laboratory’s activities, provide fire extinguishers, first-aid facilities, spill-control materials, and other necessary emergency equipment.
- Establish emergency procedures: Clearly display emergency contact information, evacuation routes, and procedures for handling chemical spills, fire, accidental exposure, or other laboratory incidents.
- Plan waste disposal: Establish a system for the collection, temporary storage, and appropriate disposal of laboratory waste in accordance with applicable safety and environmental requirements.
Conclusion
Setting up a Soil Testing Lab requires careful planning, from defining the testing scope and organising the laboratory layout to selecting suitable equipment and establishing proper sample preparation procedures. Quality control, safety, waste management, documentation, and staff training should also be incorporated from the beginning to create a structured and efficient laboratory workflow.
Choosing the right equipment is an important part of building a functional soil testing facility. Labkafe offers a range of laboratory instruments, equipment, and essential supplies to support different soil testing requirements. Explore Labkafe’s laboratory solutions to plan and equip your Soil Testing Lab according to your testing needs and operational requirements.






Leave a Reply