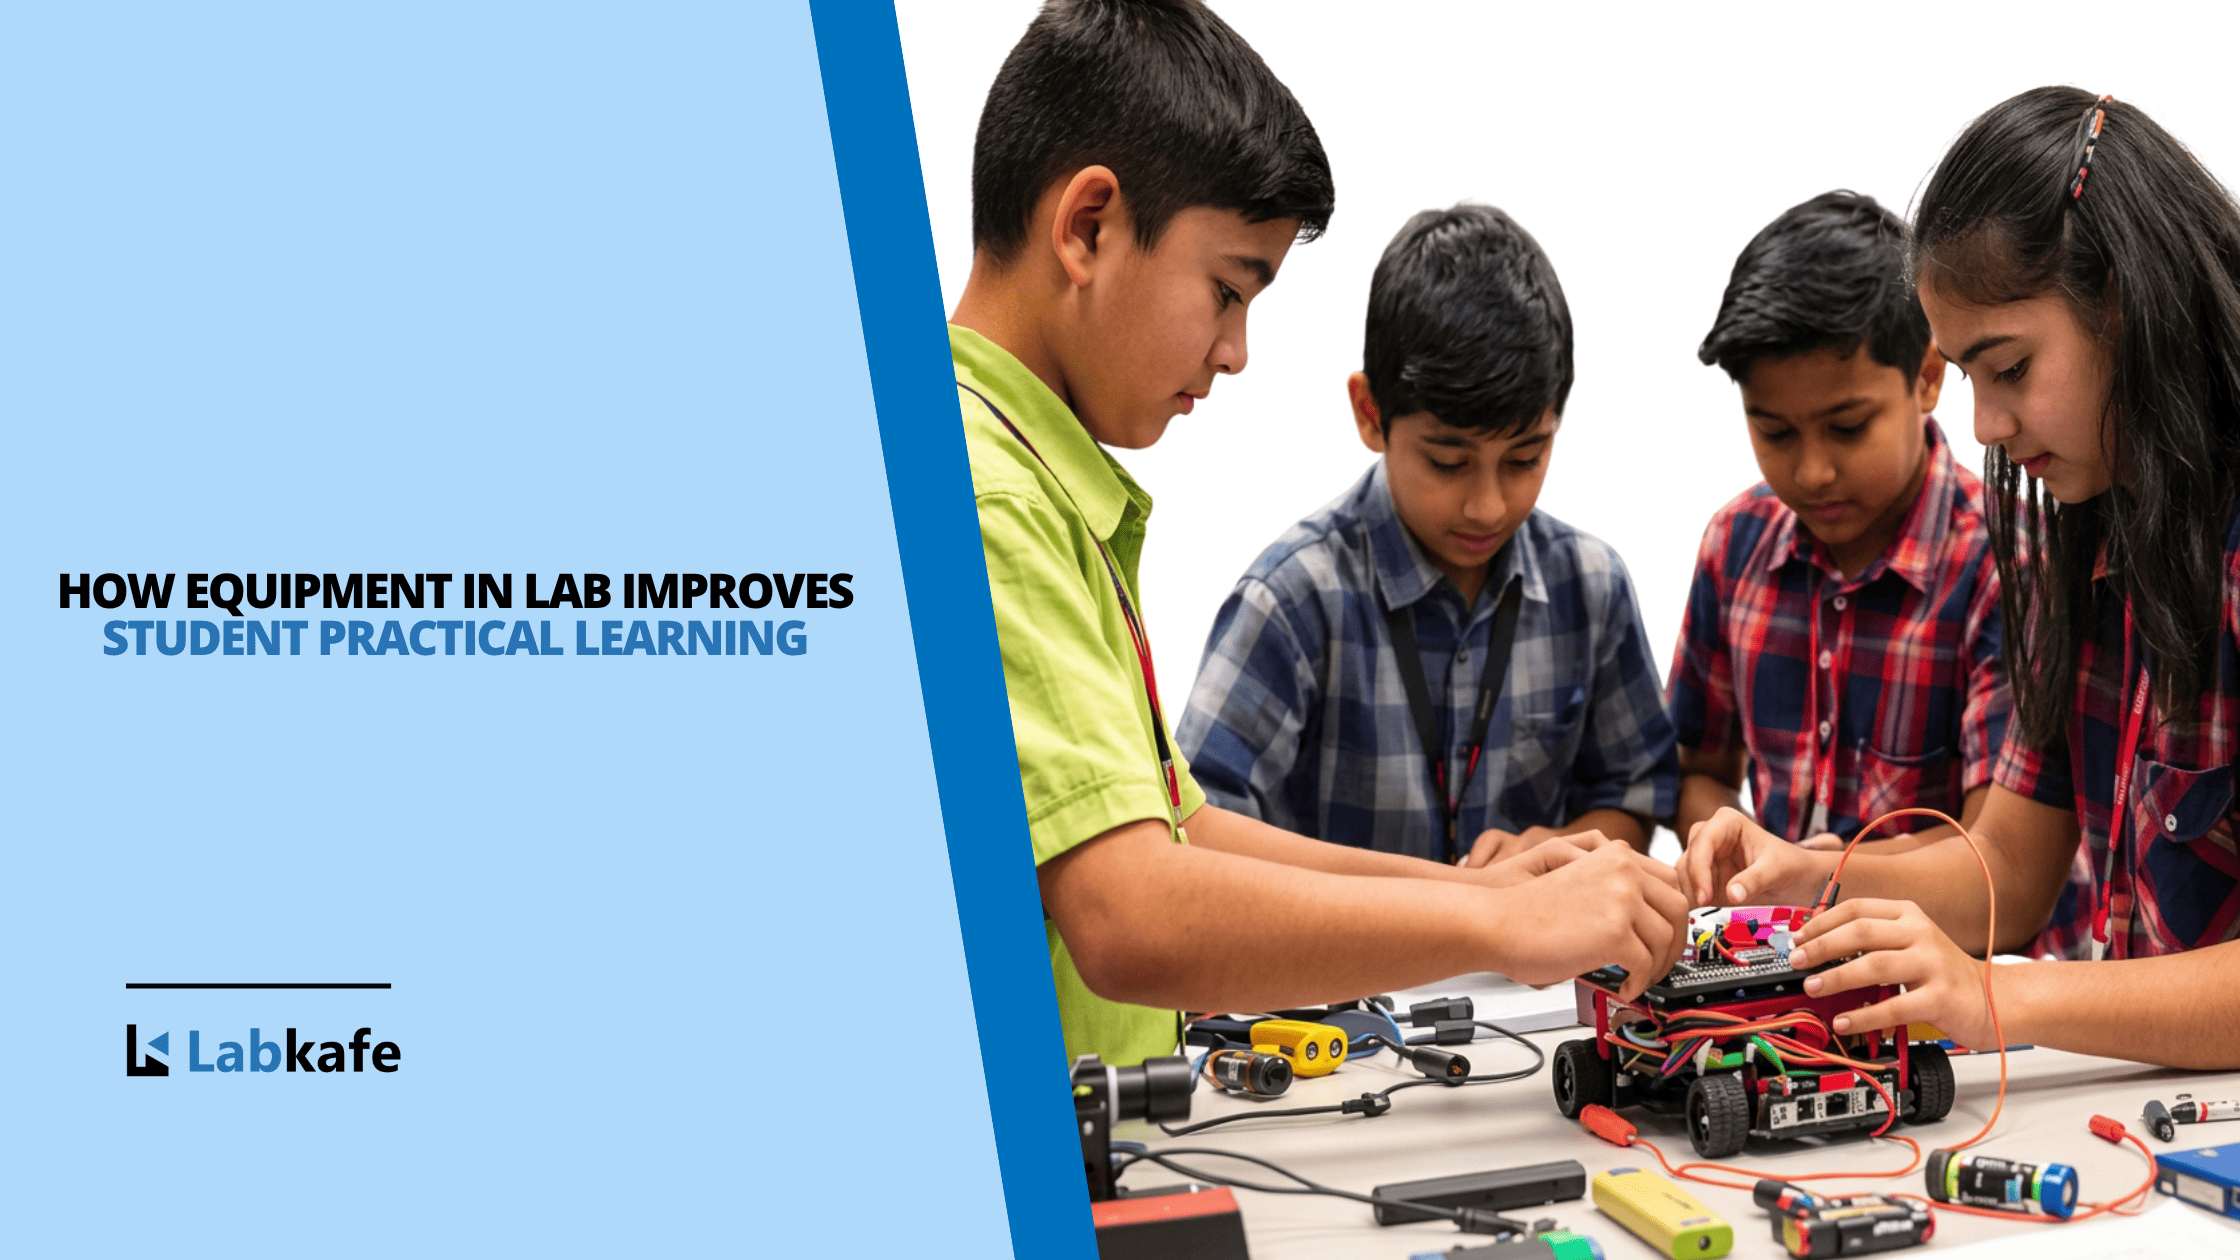
Working Windmill Model for School Demonstration Projects
If you need a working windmill demonstration model for a school project, this ready-to-use version is the perfect solution.
Many students often struggle to make a proper windmill model on their own. Cutting cardboard and building DIY setups can take a lot of time and may not work correctly. These challenges can make science projects stressful instead of educational.
To solve this, we offer a prebuilt working windmill demonstration model. It helps students understand how the mechanical energy of the wind gets converted into electricity. Teachers can use it for classroom demonstrations, students can present it in school exhibitions, and parents can use it to explain the importance of renewable energy.
How Does a Windmill Work?
A windmill, also known as a wind turbine, wind generator, or wind turbine generator, is a device that converts the kinetic energy of wind into electrical energy. Wind is a natural and renewable source of energy.
Unlike a fan or ventilator, which uses electricity to move air, a wind turbine does the reverse. It uses the movement of air to produce electricity.
As the wind blows, it pushes against the blades of the turbine. These blades are shaped like the propellers of an airplane and are designed to capture the wind’s energy using aerodynamic force. When the blades rotate, they turn a rotor connected to a generator. This generator then produces electricity.
Introducing the Working Windmill Demonstration Model

This ready-to-use windmill model is a powerful educational tool designed to make learning about renewable energy simple, clear, and exciting. Specially created for school projects, this model helps visualize how wind energy transforms into electricity in a real-world setup.
How does the Windmill Model Work?
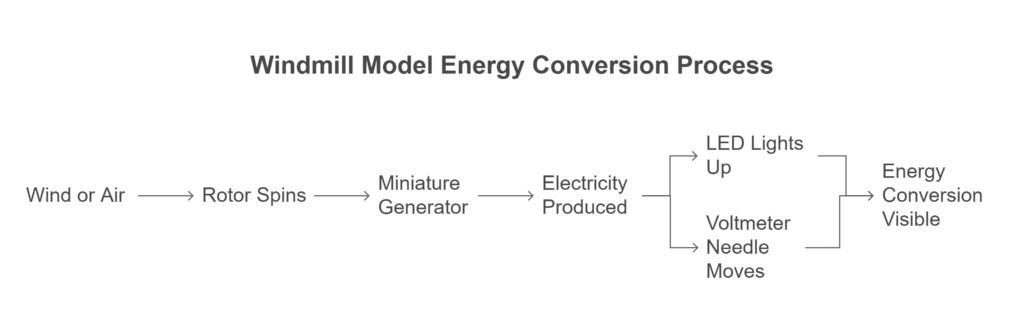
- At the heart of the model is a bright red, fan-like rotor that represents the blades of a wind turbine. When wind or air is directed at the rotor, it begins to spin—just like a real windmill. This spinning motion powers a built-in miniature generator, which produces electricity in real time.
- The generated electricity lights up an LED and moves the needle of a voltmeter, both mounted on the display panel. These instant results make it easy for students to see the process of energy conversion—from the kinetic energy of wind to usable electrical energy.
This windmill demonstration model offers a clear, hands-on experience that makes it ideal for:
- Teachers looking for effective classroom demonstrations on renewable energy.
- Students working on science projects related to energy conversion or sustainability.
- Parents who want to teach their children concepts of energy transformation in an interactive way.
How to Use the Windmill Model for School Projects?
Confused about what to learn or show in a windmill demonstration project? This blog will guide you through all the theory you need to effectively use the working windmill model for:
- School projects
- Classroom practical
- Science exhibitions
How to Demonstrate the Windmill Model?
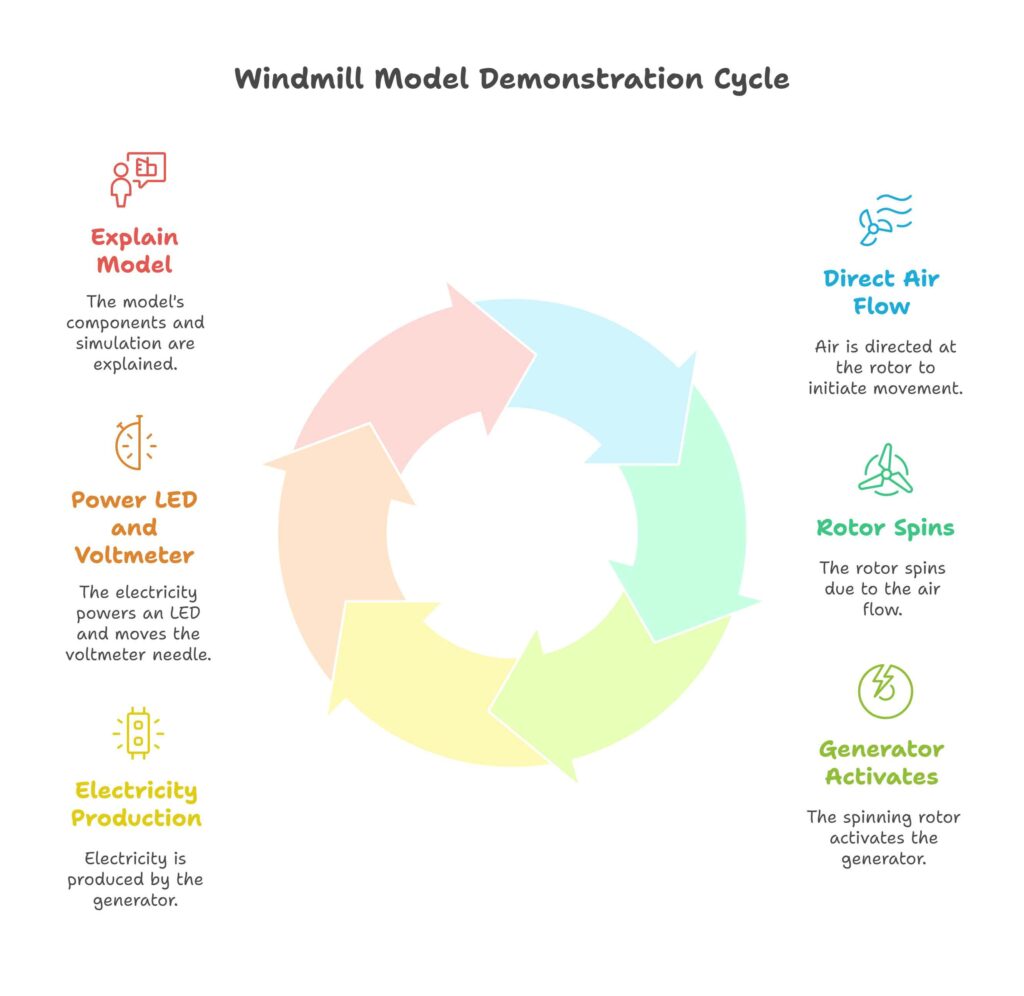
- Direct air at the red rotor using a fan or a blower.
- The rotor begins to spin, just like real windmill blades.
- This spinning motion drives a small internal generator.
- The generator produces electricity in real time.
- The electricity powers an LED and moves the voltmeter needle.
- You can then explain each part of the model and how it simulates a real wind turbine.
This creates a complete and impressive project presentation that clearly shows the conversion of mechanical energy into electrical energy.
Bonus Concepts
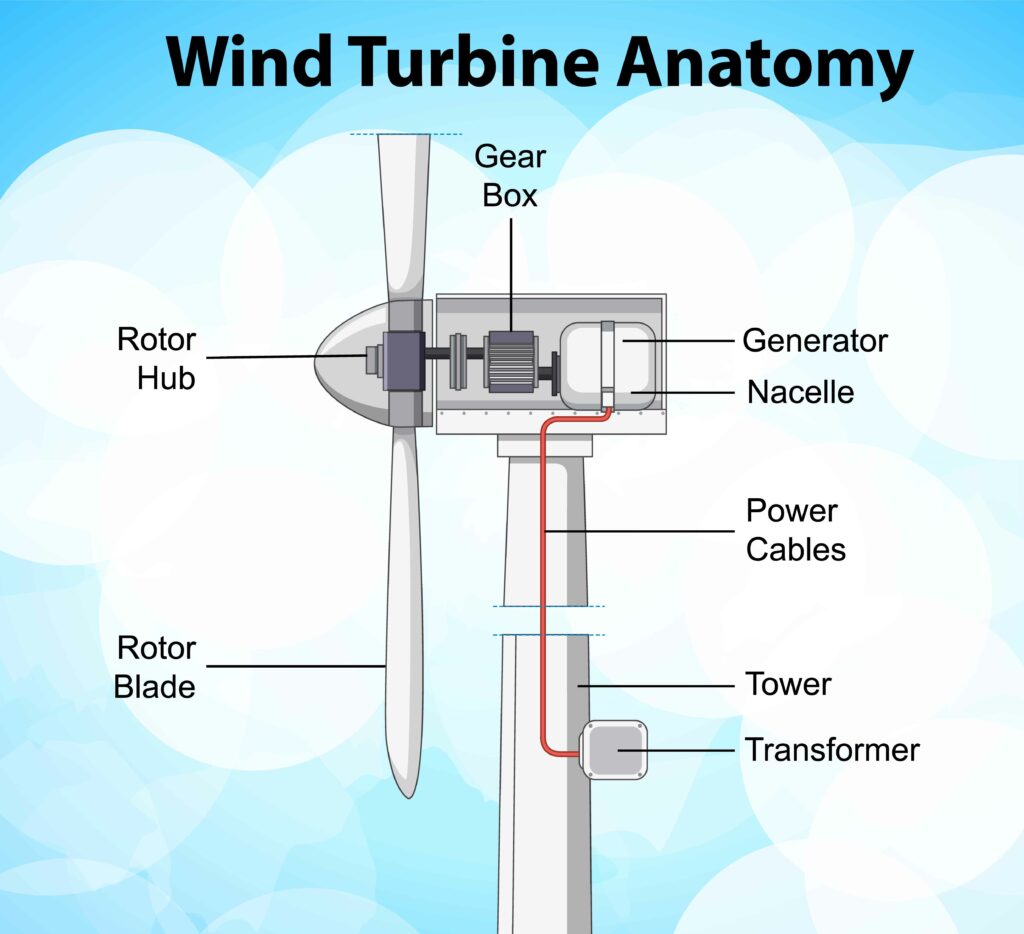
What are the five principal windmill components?
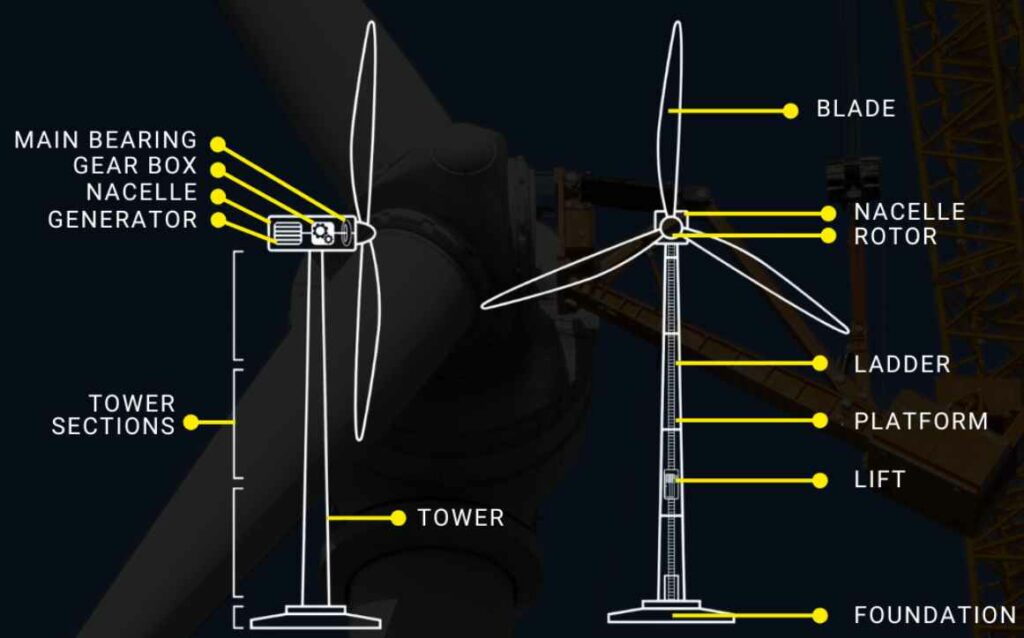
- Foundation
A large concrete block buried underground that supports the windmill and absorbs all structural forces. For offshore turbines, the foundation is underwater. - Tower
Usually made of steel (or sometimes wood), the tower supports the nacelle and blades. It is often as tall as the blade diameter and holds power cables running down to the transformer. - Nacelle
Mounted at the top of the tower, the nacelle rotates 360° to face the wind. It contains key components like the gearbox and generator. - Rotor and Hub
The rotor includes the blades and the hub (the nose-like part). Two-blade rotors are faster and cheaper but noisier than three-blade designs. The hub connects the blades to the nacelle’s mechanical system. - Blades
Typically, 52 meters long, blades catch the wind using aerodynamic lift and drag. When lift exceeds drag, they spin the rotor to generate electricity.
What are the two types of wind turbines?
- Horizontal-Axis Turbines:
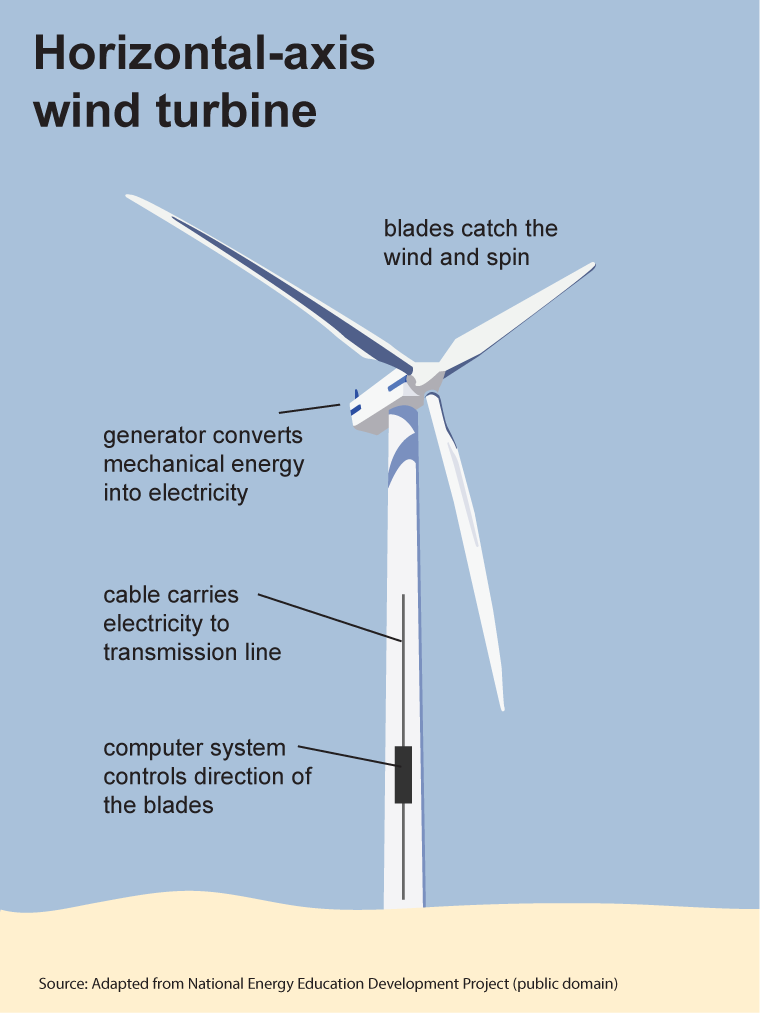
- Have blades like airplane propellers (usually three).
- Most common type in use today.
- Can be as tall as a 20-story building.
- Blades often exceed 100 feet in length.
- Taller turbines with longer blades generate more power.
2. Vertical-Axis Turbines:
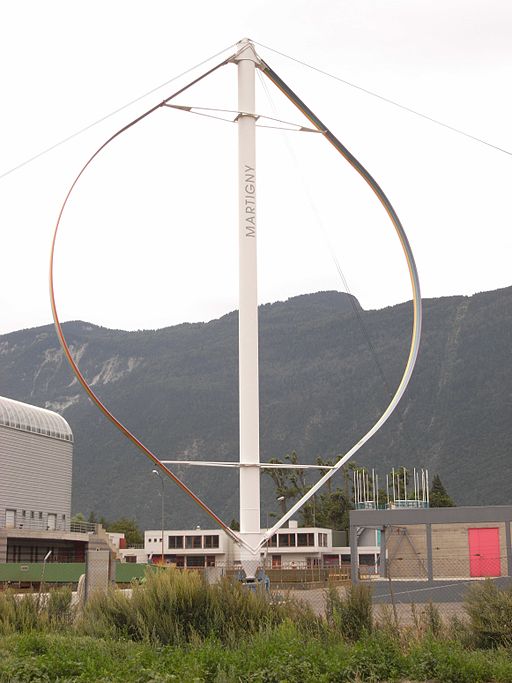
- Blades attach to the top and bottom of a vertical rotor.
- Common design: Darrieus turbine (eggbeater shape).
- Some reach 100 feet tall and 50 feet wide.
- Rarely used today due to lower performance.
Name 5 uses of windmills other than generating electricity.
- Milling Grain (Gristmills):
- Traditionally used across Europe and Britain.
- Used wind power to grind grain into flour.
- Allowed precise control over the grinding process.
- Spread globally, including to American and Australian settlements.
- Water Pumping (Windpumps):
- Common in rural Australia and parts of the US.
- Draw water from underground aquifers for irrigation and livestock.
- Wind turns blades, which drive a mechanical water pump.
- Flood Control:
- In the Netherlands, windmills pumped water out of low-lying areas.
- Prevented flooding in areas below sea level.
- England also used similar drainage mills before switching to electric pumps.
- Pond and Lake Aeration:
- Windmills pump air into stagnant water.
- Increases oxygen levels, reducing algae growth.
- Supports aquatic life and improves water quality.
- Decorative Use:
- Used in gardens, parks, or playgrounds.
- Often non-functional, used for aesthetic or educational purposes.
- Full-sized wind wheels are sometimes installed as structures or play elements.


Leave a Reply