
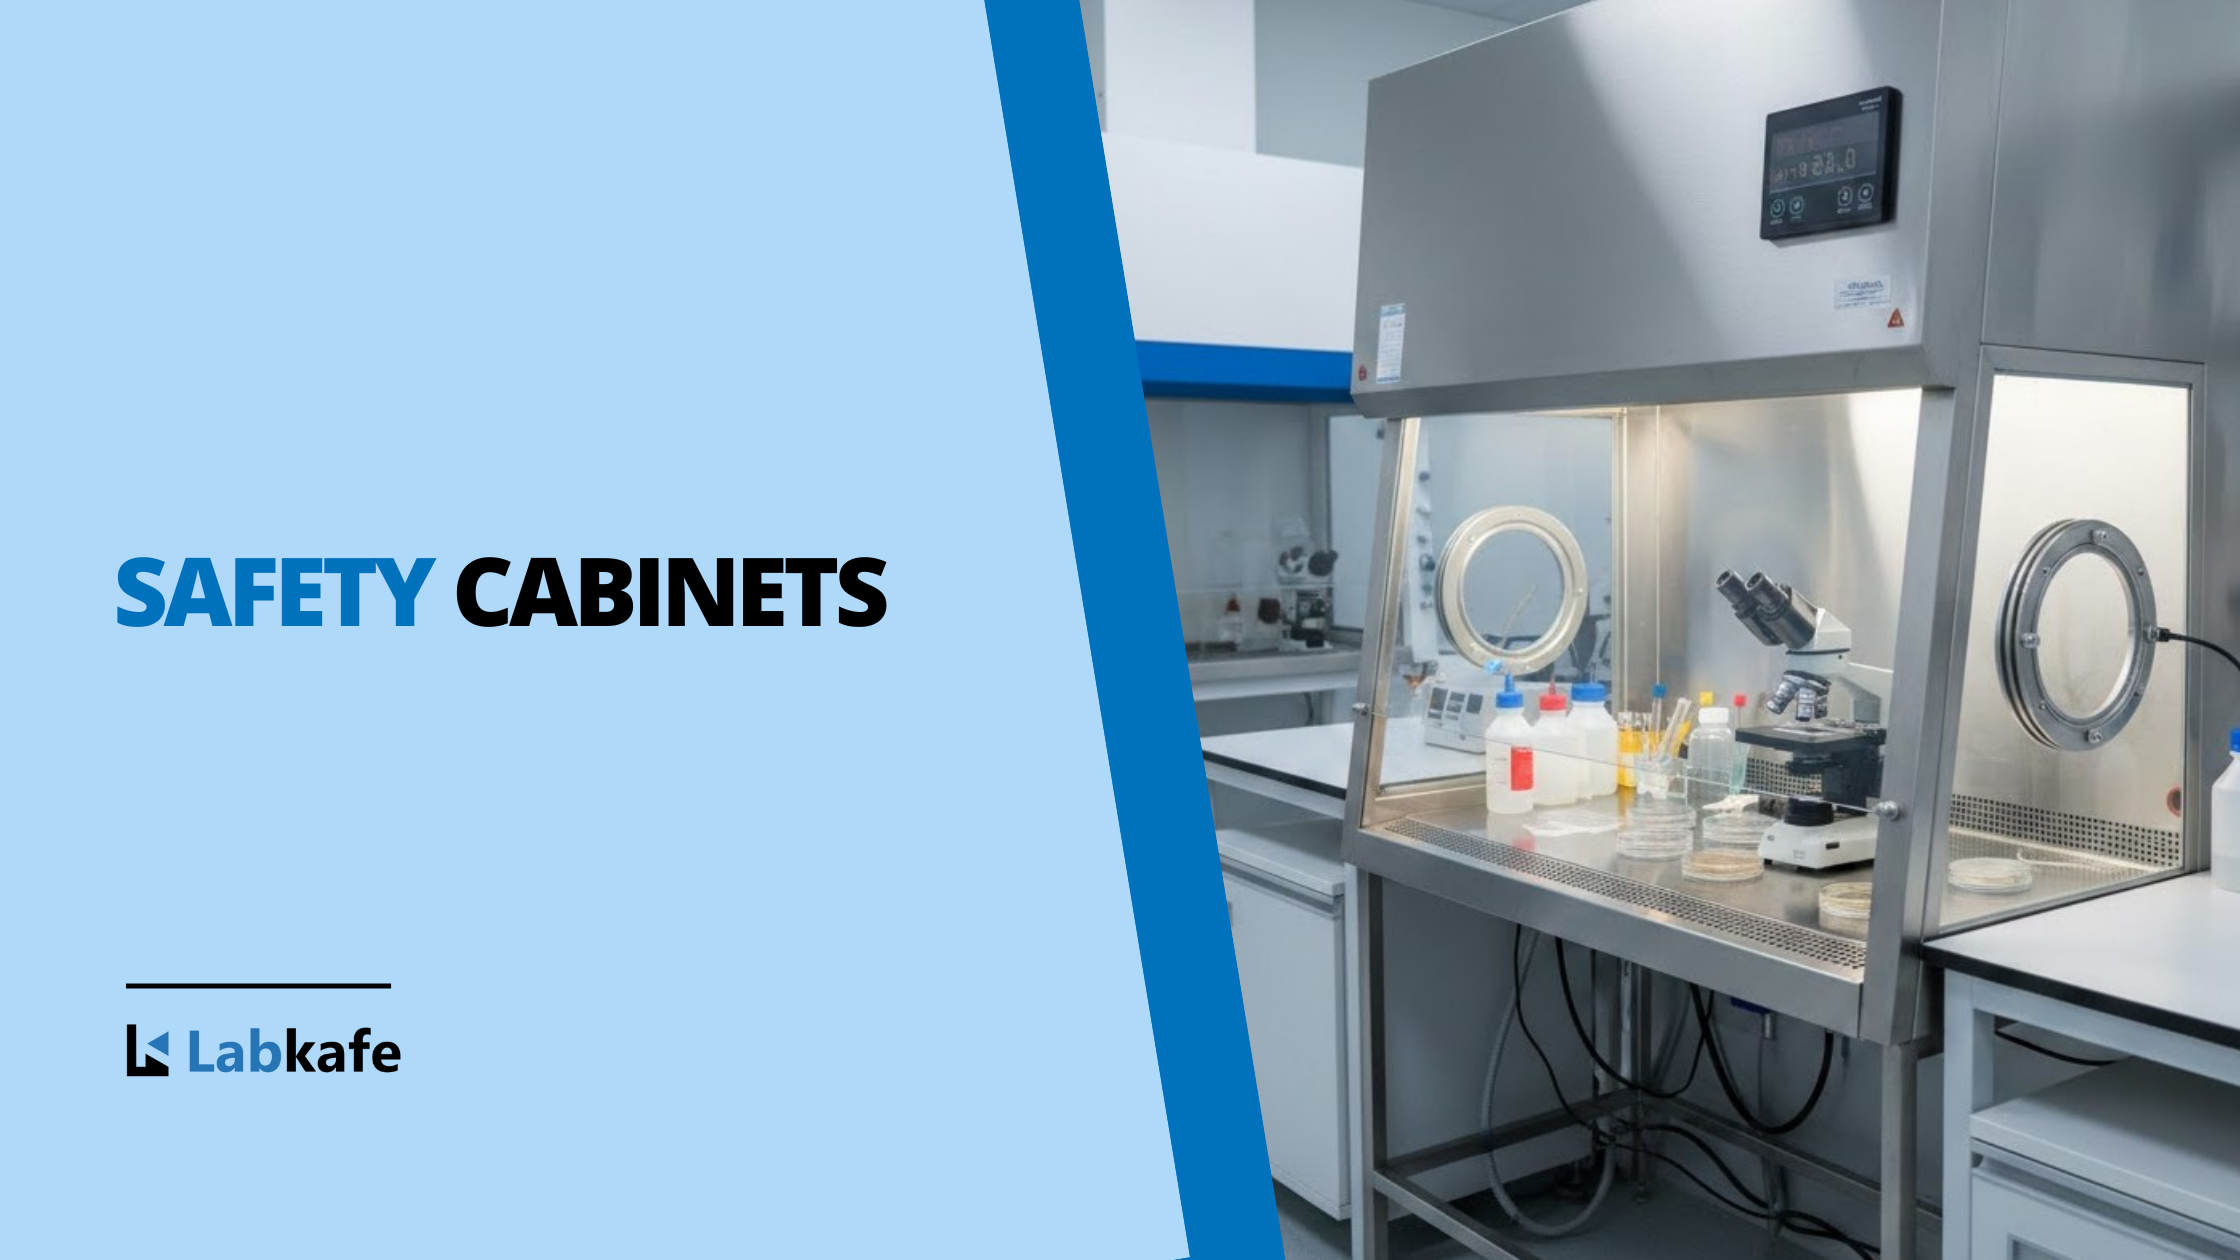
A biological safety cabinet (BSC) is critical for protecting personnel, products, and the environment from airborne contaminants. Proper operation is paramount to prevent sample contamination, maintain culture integrity, and ensure the long-term effectiveness of the BSC itself.
How to Use a Biological Safety Cabinet?
Biological safety cabinets (BSCs) need to be operated in a certain way in order to ensure sample purity, maintenance of sterility and longevity of the involved equipment and the BSC itself.
1. Pre-Operation Procedures & Personal Preparation
UV Light Decontamination

- Turn on the UV lamp inside the biological safety cabinet for 20 minutes before beginning work.
- Ensure the UV lamp has the correct power setting.
- The biological safety cabinet sash must be closed, and no personnel should be in the immediate vicinity or within the room while the UV light is active. UV radiation is highly harmful and can cause severe skin burns and blindness.
Personal Protective Equipment
- Sanitize hands thoroughly with 70% ethanol and allow it to dry completely.
- Wear protective gloves.
- Don a lab coat, followed by a face mask and safety glasses.
Gather Supplies
Collect all necessary supplies and reagents for your procedure.
2. Setting Up the Biological Safety Cabinet for Experiments
Switch off the UV lamp before beginning your work. This is a must. Only then can you proceed with the next steps.
Initiate Airflow in the Biological Safety Cabinet

- Open the biological safety cabinet sash to the correct working height (often indicated by a marking).
- Turn on all blowers and cabinet illumination lights.
- Allow the system to run for at least 5 minutes. This purges any circulating airborne pathogens, which will be trapped by the HEPA filter, and allows the air streams to stabilize.
Safety Checks
- Before starting work, visually check for any alarm systems to ensure proper functioning.
Surface Decontamination
- Wipe the entire inner work surface of the biological safety cabinet with a clean tissue saturated with 70% ethanol. This removes any remaining pathogens, dust residue, or surface contaminants. Do not use a spray bottle to apply disinfectant; this can disrupt airflow and recirculate solvent vapors.
3. Best Practices During Operation of Biological Safety Cabinet
Minimize Airflow Disturbances in the Biological Safety Cabinet
- Slow, Deliberate Movements: Air streams in biological safety cabinets are easily destabilized. Perform all operations using slow, deliberate movements. Quick movements disrupt the protective air barrier.
- Minimize In/Out Movements: Reduce the number of times you move your hands and arms in and out of the cabinet. Each time you introduce your hands, wait approximately 1 minute to allow the air streams to re-stabilize and surface contaminants to be removed. Decontaminate your hands/gloves before removing them from the biological safety cabinet.
- Side-to-Side Movements: In Class I and II BSCs, minimize side-to-side movements to maintain the integrity of the air barrier.
- Avoid Blocking Grilles: Always work as far into the biological safety cabinet as ergonomically possible. Never block the front grille of a Class II BSC by resting your arms on it or placing items on it, as this obstructs airflow. Similarly, do not block the rear vents.
Managing Materials and Workflow
- Sterile Supplies: Confirm that all necessary equipment and supplies for the procedure are already inside the BSC and are sterile.
- One Operator: Allow only one BSC operator at a time.
- Proper Seating: Sit at the biological safety cabinet with your armpits level with the bottom of the sash.
- Working Zone: Perform all operations at least 4 inches (approx. 10 cm) from the front grille on the work surface.
- Minimize Room Disturbances: Minimize activities that create eddy currents, such as opening and closing doors/windows or personnel walking rapidly near the cabinet.
- Disposable Armrests (Foam)
Disposable arm pads can be placed on the work surface but must not cover the front or rear grille openings. Their use facilitates routine cleanup and reduces splatter and aerosol generation during spills.
Handling Plasticware and Glassware in a Biological Safety Cabinet
- Handling Tubes/Bottles: When working with tubes or bottles, always hold them in an inclined position (never vertically) and close them immediately when not in use. This prevents formation of aerosols that can enter the circulation.
- Petri Dishes/Culture Plates: Hold Petri dishes and tissue culture plate lids above the open sterile surface to minimize the direct impact of downward air.
- Recap Promptly: Recap and cover bottles and tubes as soon as possible after use. This prevents entry of microorganisms and dissipation of aerosols.
- Optimal Placement: Place all materials as far back in the biological safety cabinet as practical, toward the rear edge of the work surface.
- Aerosol-Generating Equipment: Position aerosol-generating equipment (e.g., vortex mixers, tabletop centrifuges) toward the rear of the cabinet.
- Bulky Items: Place bulky items such as biohazard bags, discard pipette trays, and vacuum collection flasks to one side of the interior of the cabinet.
- Maintain Clearance: Keep all materials at least four inches inside the sash opening.
4. Prohibited Items and Safety Concerns
Open Flames are Strictly Prohibited

- Open flames are unnecessary in the near microbe-free environment of a BSC. Flames create an upward air current; within a biological safety cabinet, it creates turbulence that disrupts the critical HEPA-filtered airflow.
- Explosion Risk: Leaking Bunsen burners, tubes, or valves can go unnoticed in recirculating biological safety cabinets , leading to explosions, especially with flammable gases.
- Burn Hazard: The confined space increases the risk of gloves (potentially contaminated with ethanol) coming into contact with flames, causing severe burns.
- Safer Alternatives: If heat sterilization is indispensable, use safer methods such as touch-plate micro burners with pilot lights, small electric “furnaces,” or pre-sterilized loops. Refer to the Biological Safety Cabinets Open Flames and Flammable Gas Policy for alternatives.
- Flammable Disinfectants:

- Fire Hazard: Be extremely cautious with vaporized ethanol and isopropanol disinfectants. Ethanol is highly flammable, and its flames can be initially invisible, posing a significant danger. Always keep it away from any potential ignition sources (which should ideally not be present in a biological safety cabinet anyway).
- Storage:
- No Top Storage: Do not store items on top of the biological safety cabinet; this can damage the HEPA filter.
- No Internal Storage: The BSC is not a storage cabinet, it’s a safety cabinet. Only essential supplies for the current procedure should be inside to prevent contamination and maintain proper airflow.
5. Post-Operation Procedures for a Biological Safety Cabinet
- Deactivate Equipment: Turn off any equipment used inside the BSC, such as those for decontaminating bacteriologic loops and needles.
- Decontaminate Materials:
- Decontaminate all materials that will be removed from the BSC. Refer to your laboratory’s SOP (Standard Operating Procedure) for specific decontamination instructions.
- Place contaminated items into a biohazard bag, discard tray, or other suitable container before removal from the BSC.
- Purge the Cabinet:
- Run the biosafety cabinet for at least three minutes with no activity inside. This allows airborne contaminants to be thoroughly purged from the work area by the HEPA filtration system.
- Remove Equipment: Carefully remove all equipment and materials from the BSC.
- UV Lamp Maintenance (if applicable):
- Clean the UV lamp weekly to remove dust and dirt that can block its germicidal effectiveness.
- Check the output intensity of the UV lamp weekly to ensure it is emitting the correct amount of UV light.
- Cabinet Cleaning:
- Clean the BSC after each use.
- Wipe all interior surfaces with 70% ethanol. Again, do not use a spray bottle.
- Wipe (or disinfect) the surfaces of the cabinet.
To optimally utilize the biological safety cabinet, ensure its longevity, and prevent contamination of samples, these steps are necessary. They help maintain accurate results and keep the samples free from contamination, which would otherwise not be possible.


Leave a Reply